
How to Make Goat Cheese with Rennet: An Easy Step-by-Step Guide
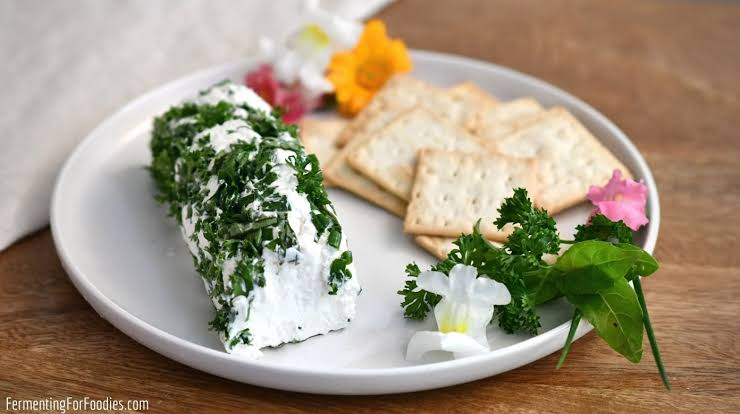
Homemade goat cheese is a delicious way to bring fresh, creamy flavor into your kitchen. Known for its slightly tangy taste and smooth texture, fresh goat cheese, often called chèvre, pairs beautifully with salads, sandwiches, crackers, and roasted vegetables. Making it at home allows you to control the saltiness, consistency, and added flavors while learning a traditional cheesemaking technique.
Learning how to make goat cheese with rennet is easier when you understand each stage of the process. With suitable goat milk, a starter culture, liquid rennet, and a few basic tools, you can transform fresh milk into soft cheese. Although the process requires patience, careful measurements and good food-handling practices help you achieve a flavorful result.
What Is Rennet, and Why Is It Important?
Rennet is a cheesemaking ingredient that helps milk coagulate, forming soft curds that can be separated from liquid whey. It is available in several forms, including animal, microbial, and certain plant-derived varieties. Different products have different strengths, so the amount needed depends on the manufacturer’s instructions and the particular recipe you choose.
Rennet works alongside a starter culture in many fresh goat cheese recipes. The culture develops acidity and contributes to flavor, while rennet supports curd formation. Understanding how these ingredients work together helps you produce cheese with the right consistency. Using too much or too little rennet can affect the final texture, so accurate measurement is essential.
Ingredients Needed to Make Goat Cheese
To prepare a basic homemade goat cheese recipe, gather one gallon of whole goat milk that is not ultra-pasteurized, a mesophilic starter culture, liquid rennet, non-iodized salt, and cool, non-chlorinated water. Follow the starter culture and rennet packaging for appropriate quantities because products vary in concentration. Some recipes also recommend calcium chloride when using certain types of pasteurized goat milk.
Each ingredient has a specific purpose in the cheesemaking process. Goat milk provides the flavor and structure, the starter culture develops acidity, and rennet helps the milk form curds. Salt enhances taste, while non-chlorinated water helps dilute the rennet before mixing it into the milk. Using fresh, suitable ingredients gives you a better chance of achieving smooth, consistent cheese.
Essential Equipment for Homemade Goat Cheese
Before beginning, gather a large stainless-steel or other nonreactive pot, an accurate kitchen thermometer, measuring spoons, a clean stirring spoon, cheesecloth or butter muslin, a colander, and a large bowl. You will also need a clean container with a lid for storing the finished cheese. Preparing your equipment in advance makes the process more organized and helps prevent unnecessary handling.
Cleanliness is especially important when working with fresh dairy products. Wash your hands and thoroughly clean and sanitize food-contact equipment according to appropriate food-safety guidance. A thermometer helps you maintain the temperature recommended by your recipe, while fine butter muslin can make draining easier. Avoid reactive cookware that could affect the milk, and keep your preparation area clean throughout the process.
Choosing the Right Goat Milk
The type of milk you choose can strongly influence how well your cheese forms. Fresh goat milk and many varieties of pasteurized goat milk are suitable for cheesemaking, provided they have not undergone processing that prevents proper coagulation. Ultra-pasteurized milk can be difficult to use because intense heat treatment changes milk proteins and may interfere with curd formation.
If you are using store-bought goat milk, check the label and select a product appropriate for your chosen recipe. Some recipes include calcium chloride to improve curd firmness when working with certain pasteurized milk. However, this ingredient is not always necessary. Following a tested recipe designed for your particular milk helps prevent weak curds and improves your chances of success.
How to Make Goat Cheese with Rennet: Preparing the Milk
Pour the goat milk into a clean, nonreactive pot and warm it gently over low heat. Many fresh chèvre recipes use a temperature between 72°F and 86°F, although the correct temperature depends on the culture and method. Check the milk with a thermometer rather than estimating its warmth by touch, and avoid overheating it during preparation.
Once the milk reaches the temperature specified by your recipe, remove the pot from the heat if instructed. Maintaining a steady temperature helps the starter culture work properly and supports the next stage of coagulation. Taking your time here is worthwhile because temperature changes can affect the cheese’s flavor, texture, and setting time.
Adding the Starter Culture
Sprinkle the recommended amount of mesophilic starter culture evenly over the milk’s surface. Allow it to rehydrate according to the product instructions, then stir gently to distribute the culture throughout the milk. Avoid vigorous mixing because you want the ingredients to blend evenly without introducing unnecessary air or disturbing the preparation process.
The starter culture encourages the development of acidity, which contributes to the characteristic tangy taste of fresh goat cheese. It also helps create conditions that support proper curd formation. Use the quantity recommended by your recipe instead of adding extra culture in an attempt to speed things up, as excessive or insufficient activity can change the final result.
How to Make Goat Cheese with Rennet: Adding Rennet
Measure the liquid rennet carefully, following the recipe and manufacturer’s instructions. Dilute it in cool, non-chlorinated water, then add the mixture to the milk. Stir gently using an up-and-down motion for approximately one minute, or for the time recommended by your chosen recipe, to distribute the rennet evenly without excessive movement.
When learning how to make goat cheese with rennet, remember that precision matters more than speed. Cover the pot after stirring and leave the milk undisturbed. Avoid repeatedly lifting the lid or moving the pot because the milk needs a stable environment to coagulate. Using the correct amount of rennet supports a more predictable setting process.
Allowing the Milk to Form Curds
Leave the covered pot at the temperature recommended by your recipe while the starter culture and rennet work together. Some fresh chèvre recipes require approximately 12 to 18 hours for coagulation, although the exact time varies with temperature, culture activity, milk composition, and rennet strength. Avoid disturbing the milk during this stage.
When the milk has coagulated properly, it should resemble a soft custard, with curds forming and whey separating around them. If the mixture remains liquid, review the milk type, ingredient measurements, temperature, and product instructions before proceeding. Do not automatically add more rennet without understanding the cause, because an unnecessary addition may negatively affect the finished cheese.
How to Make Goat Cheese with Rennet: Draining the Curds
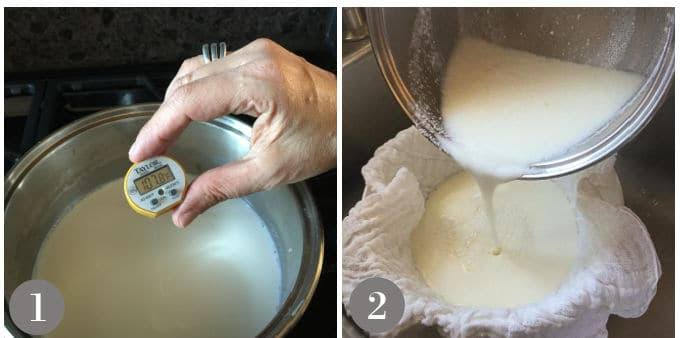
Line a clean colander with cheesecloth or butter muslin and place it over a large bowl to collect the whey. Gently transfer the curds into the lined colander, taking care not to crush them unnecessarily. The whey will gradually drain through the cloth, leaving the soft cheese solids behind.
Draining time determines much of the finished cheese’s consistency. A shorter draining period generally produces softer, more spreadable cheese, while longer draining creates a firmer texture that is easier to shape. Depending on the recipe and the moisture level you prefer, draining may take several hours. Keep the process hygienic and follow the recipe’s guidance for safe handling.
Salting and Shaping the Cheese
Once the curds have reached your preferred consistency, transfer them to a clean bowl. Add non-iodized salt gradually and mix gently until it is evenly distributed. Starting with the amount specified in your recipe helps you avoid making the cheese too salty, while careful mixing preserves its soft texture.
You can keep the cheese plain or add suitable flavorings such as fresh chives, thyme, cracked black pepper, or other herbs. Shape the cheese into small rounds or logs, or leave it in a container as a soft spread. Transfer the finished cheese to a clean, covered container and refrigerate it promptly.
Tips for Creamy and Flavorful Goat Cheese
Consistent measurements and temperature control are two of the most useful habits for successful cheesemaking. Use suitable milk, check your thermometer, and follow the instructions supplied with your starter culture and rennet. Because products vary, avoid assuming that a quantity suitable for one rennet will work equally well with another brand or concentration.
For a creamier result, monitor the curds as they drain and stop when the cheese reaches the texture you want, provided the recipe’s food-safety requirements are met. For firmer cheese, allow additional draining time as directed. You can experiment with seasonings after mastering the basic method, making small adjustments to flavor without changing several parts of the recipe at once.
Common Goat Cheesemaking Problems and Solutions
If your milk does not form curds, several factors may be responsible, including unsuitable milk, inactive rennet, incorrect temperatures, or problems with the starter culture. Review the ingredients and preparation steps before trying another batch. Keeping notes about the milk type, measurements, temperature, and setting time can help you identify patterns and improve future results.
Cheese that is too soft may need more draining, while cheese that becomes too dry or crumbly may have lost too much moisture. Adjust draining time gradually in later batches. Fresh goat cheese should have a clean, characteristic dairy aroma. If you notice unexpected odors, discoloration, visible mold, or other signs of spoilage, discard the cheese instead of tasting it to determine whether it is safe.
How to Store Homemade Goat Cheese
Place fresh goat cheese in a clean, covered container and refrigerate it promptly at 40°F or below. Label the container with the date it was prepared and use clean utensils whenever you serve it. Keeping the cheese protected from contamination helps maintain its quality and reduces unnecessary exposure to other foods in the refrigerator.
The storage life of homemade goat cheese depends on moisture, preparation, handling, and refrigeration conditions. Do not assume every batch will remain fresh for the same length of time. Follow reliable recipe guidance for storage duration, and discard cheese that shows signs of spoilage. Good refrigeration and careful handling are essential because fresh cheese contains moisture and requires appropriate food-safety precautions.
Delicious Ways to Enjoy Homemade Goat Cheese
Fresh chèvre adds a creamy, tangy flavor to everyday meals. Spread it over crusty bread, serve it with crackers, or crumble it over salads and roasted vegetables. Its distinctive taste also works well in sandwiches, savory pastries, omelets, and homemade pizza, making it a useful ingredient to keep available for quick lunches and simple appetizers.
For an easy appetizer, serve goat cheese with fresh herbs, cracked black pepper, or a small amount of honey. You can also blend it into dips and spreads or combine it with roasted peppers and other vegetables. Experimenting with different ingredients allows you to enjoy your homemade cheese in several ways without making the basic cheesemaking process more complicated.
Conclusion
Learning how to make goat cheese with rennet is a rewarding way to enjoy fresh, homemade dairy. With suitable goat milk, carefully measured ingredients, clean equipment, and patience, you can produce creamy chèvre with a delicious tangy flavor. Each stage, from warming the milk to draining the curds, contributes to the final texture and taste.
Once you understand how to make goat cheese with rennet, you can explore different herbs, seasonings, and serving ideas to make the cheese suit your preferences. Focus on accurate measurements, stable temperatures, and safe refrigeration, and keep notes about each batch. With practice, homemade goat cheese can become a versatile and satisfying addition to your kitchen.
Frequently Asked Questions
How much rennet do you need to make goat cheese?
The amount depends on the milk volume, rennet strength, and recipe. Follow the manufacturer’s instructions and use a tested recipe designed for your chosen product. Measuring accurately helps support consistent curd formation and reduces the risk of an unsuitable texture.
Can you make goat cheese with store-bought milk?
Yes, many types of pasteurized goat milk can be used successfully. However, ultra-pasteurized milk may not coagulate properly. Check the label and choose milk that is appropriate for the cheesemaking method you plan to follow.
How long does homemade goat cheese take?
The process may take approximately 18 to 30 hours or longer, depending on culturing, coagulation, and draining time. Some stages require little hands-on work, but the milk needs sufficient time to develop curds and reach the desired consistency.
Do you need a starter culture?
Many fresh goat cheese recipes use a mesophilic starter culture to develop acidity and flavor. Some alternative methods differ, so follow a tested recipe designed for your ingredients rather than substituting cultures without guidance.
Can you make goat cheese without calcium chloride?
Yes. Calcium chloride is optional in many recipes, although it may improve curd formation with certain pasteurized milk. Its usefulness depends on the milk’s processing and the specific cheesemaking method.
How long does homemade goat cheese last in the refrigerator?
Storage life varies with the recipe, moisture level, handling, and refrigeration conditions. Keep the cheese at 40°F or below and follow reliable recipe guidance for storage duration. Discard any cheese that appears spoiled.
